Ginger Bug Recipe
My Story With Ginger Bug Recipe
I still remember the first time I discovered the magic of a ginger bug recipe. It was in my grandmother’s kitchen, where every jar of fermenting ginger smelled like home and comfort.
She would tell me, “Bubbles mean life, and life means flavor.” Years later, I decided to make my own ginger bug, and I was hooked from day one.
If you’ve ever wanted to create natural probiotics for homemade sodas or healthy fermented drinks, this guide is the perfect place to start.
Learn how to turn your starter into delicious fizzy drinks with our Ginger Bug Soda Recipes collection.
What Is a Ginger Bug Recipe?
Understanding the Concept of Ginger Bug
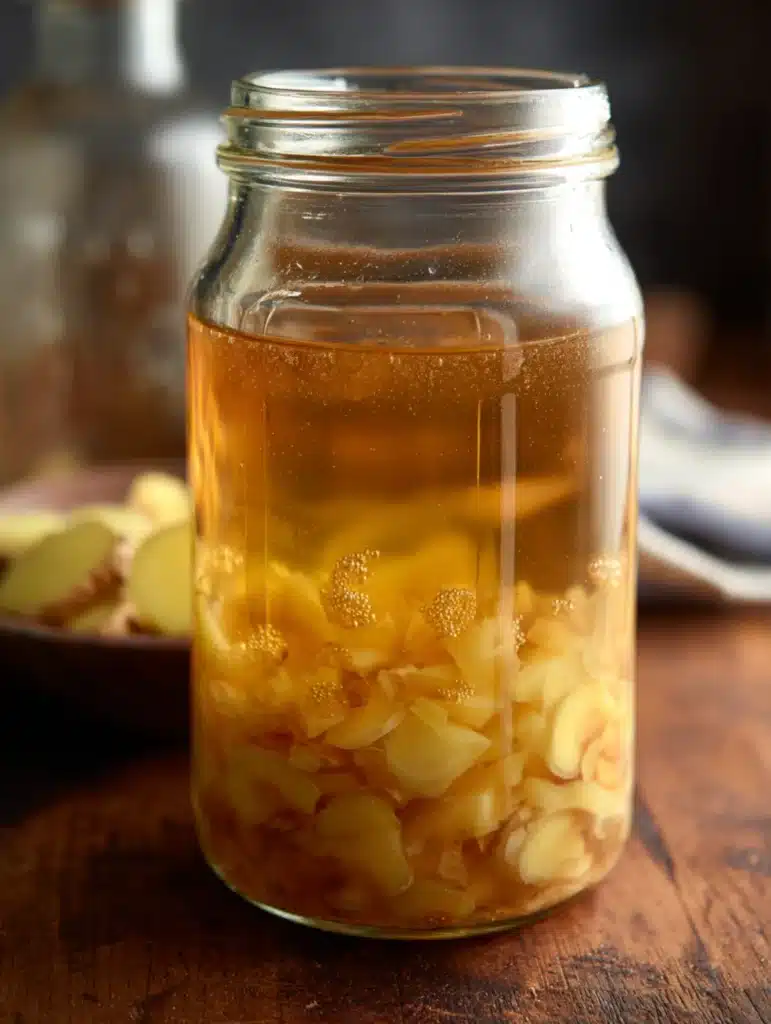
A ginger bug recipe is a natural starter culture made by fermenting fresh ginger, raw sugar, and water. This bubbly liquid is rich in wild yeast and beneficial bacteria, creating a natural base for fermenting homemade sodas and drinks.
The process works similarly to a sourdough starter, except here, ginger acts as the main ingredient to cultivate probiotics.
When properly prepared, the starter becomes fizzy and aromatic, signaling that it’s alive and ready to use.
The beauty of a ginger bug lies in its simplicity. With just three ingredients and a little patience, you can craft a healthy fermentation base that enhances gut health and flavors your beverages naturally. Whether you’re new to fermentation or just curious, this starter is a perfect first step.
FOR MORE RECIPES FOLLOW ME ON PINTEREST
Benefits of Making a Homemade Ginger Bug
Creating a ginger bug at home offers many benefits:
- All-natural fermentation – No artificial additives or chemicals.
- Probiotic-rich – Promotes healthy digestion and boosts gut flora.
- Versatile base – Can be used in countless soda and kombucha recipes.
- Cost-effective – Saves money compared to buying store-bought probiotic drinks.
For example, when you mix a well-fed ginger bug with fresh fruit juices, the natural yeast ferments the sugars, giving you a sparkling homemade soda. It’s an easy, fun, and rewarding process that anyone can do at home.
Print
Ginger Bug Recipe
This ginger bug recipe is a natural probiotic starter made from fresh ginger, sugar, and water. Perfect for homemade sodas, ginger beer, and fermented beverages, this starter is easy to prepare, packed with healthy bacteria, and adds a tangy fizz to your drinks.
- Total Time: 4–7 days (fermentation time)
- Yield: 1 cup
Ingredients
Start Ginger Bug
-
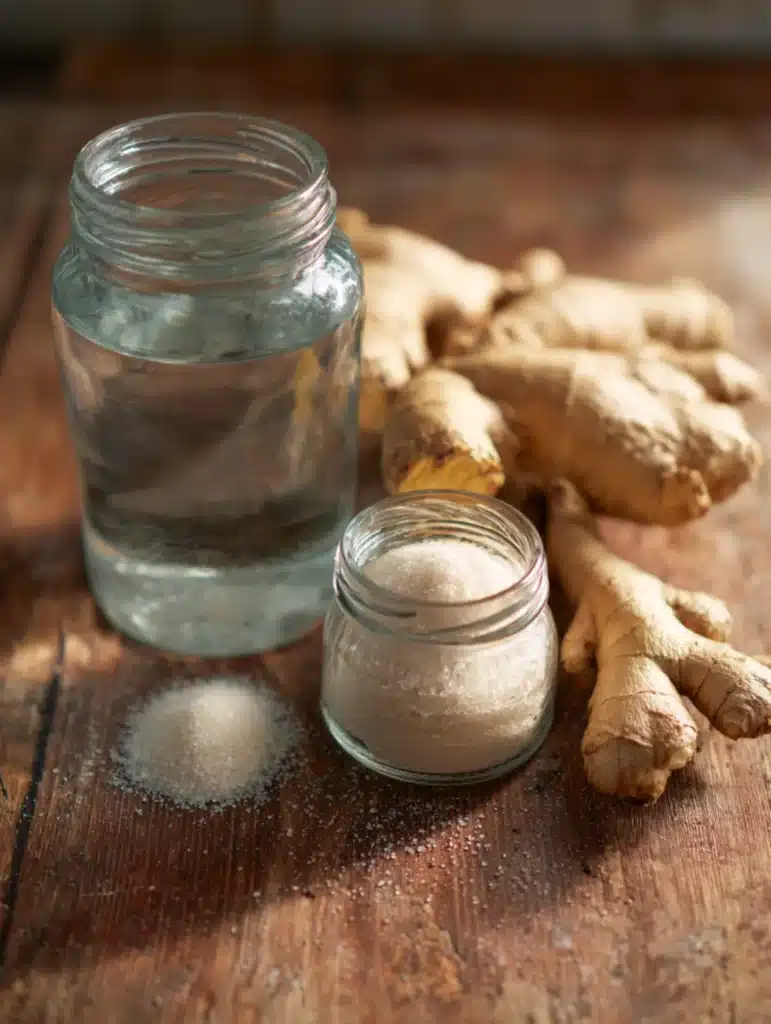
2 cups filtered or bottled spring water
-
1 tablespoon organic ginger, chopped into ⅛-inch pieces (unpeeled)
-
1 tablespoon organic raw cane sugar
For Daily Feeding
-
¼ cup chopped organic ginger (divided over 5–7 days)
-
¼ cup organic raw cane sugar (divided over 5–7 days)
Instructions
Step 1: Prep Ginger
-
Wash fresh organic ginger under cold water and pat dry.
-
Chop the ginger into small ⅛-inch pieces. Leave the skin on for natural yeast.
Step 2: Start Ginger Bug
-
Pour 2 cups of filtered water into a one-quart glass jar.
-
Add 1 tablespoon of chopped ginger and 1 tablespoon of raw cane sugar.
-
Stir with a sterilized spoon until the sugar dissolves.
-
Cover the jar with a breathable cotton cloth and secure with a rubber band.
-
Leave the jar at room temperature, out of direct sunlight.
Step 3: Daily Feeding
-
Every 24 hours, add 2 teaspoons of chopped ginger and 2 teaspoons of raw sugar to the jar.
-
Stir and re-cover. Continue this feeding schedule for 4–7 days.
-
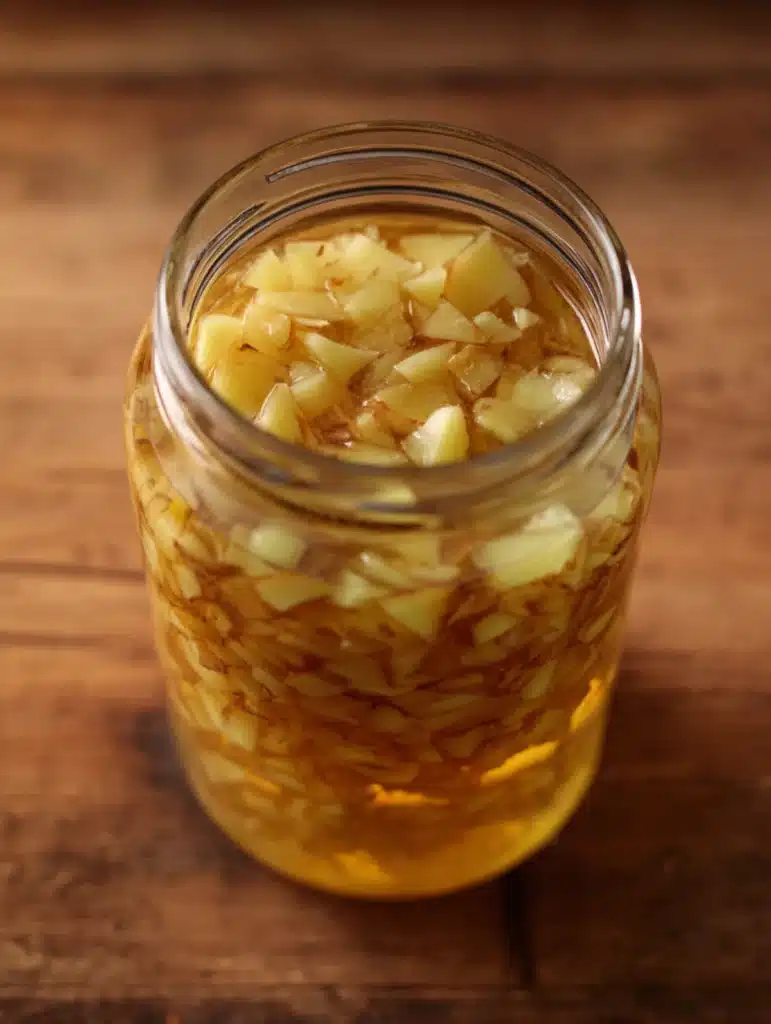
Watch for bubbles, a slightly tangy aroma, and fizziness—signs your starter is active.
Step 4: Strain and Store
-
Once active, strain the liquid into a clean jar.
-
Discard the old ginger pieces.
-
Replace any used liquid with an equal amount of water, 1 tablespoon chopped ginger, and 1 tablespoon sugar.
-
Store the starter in the refrigerator and feed weekly.
Notes
-
Always use filtered or bottled water to avoid chlorine.
-
Organic ginger works best due to its natural yeast content.
-
If mold appears, discard and start over.
-
Don’t overfeed the bug—it needs time to digest sugar.
- Prep Time: 10
- Category: Fermentation Starter
- Method: No-Cook
- Cuisine: Global/Traditional
- Diet: Gluten Free
Ingredients & Tools Needed for Ginger Bug Recipe
Essential Ingredients for Ginger Bug Starter
To create a perfect ginger bug recipe, you only need a few simple ingredients, yet each plays a key role in the fermentation process:
- Fresh organic ginger: Keep the skin on because it contains natural yeast and beneficial bacteria that help kickstart fermentation.
- Raw cane sugar: This acts as the food source for the wild yeast and bacteria. Always use organic raw sugar for the best results.
- Filtered or bottled water: Chlorinated water can slow or stop fermentation, so it’s best to use water without additives.
A classic ginger bug recipe starts with 2 cups of filtered water, 1 tablespoon of chopped organic ginger, and 1 tablespoon of organic raw cane sugar. These proportions ensure a healthy environment for fermentation while developing the perfect balance of sweetness and tang.
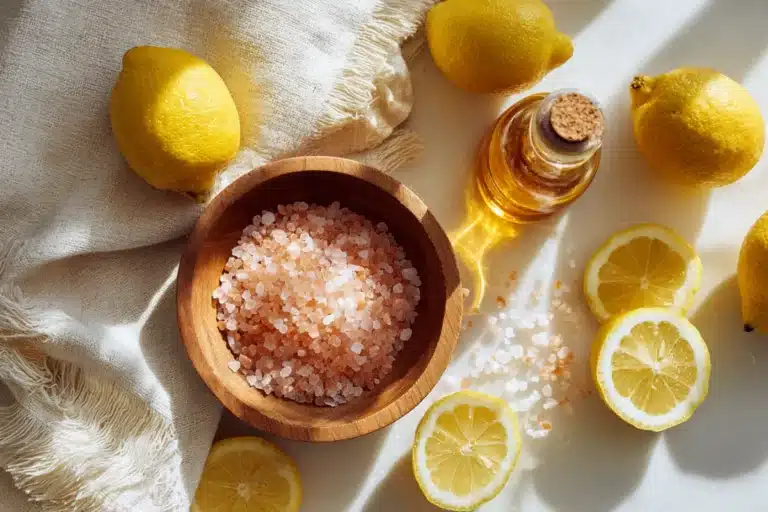
Discover other refreshing natural drinks like Japanese Pink Salt with Baking Soda for a unique twist.
Equipment and Preparation Tips
Besides ingredients, having the right equipment is important for success. Here’s what you’ll need:
- One-quart glass jar: Choose a jar with enough space for bubbling and expansion.
- Breathable cotton cloth and rubber band: Covering the jar with a breathable cloth keeps dust out while allowing airflow.
- Sterilized spoon or spatula: Clean utensils prevent contamination.
- Measuring spoons: Accurate measurements help maintain proper feeding ratios.
Tips to Prepare:
- Wash and dry the ginger before chopping it into small ⅛-inch pieces.
- Ensure all utensils and jars are completely clean to avoid introducing harmful bacteria.
- If possible, pre-chop a week’s worth of ginger and store it in the refrigerator to save time during daily feedings.
The magic of a ginger bug recipe lies not only in ingredients but also in consistency. Feeding your starter daily ensures a healthy and active culture ready for your next homemade soda.
Step-by-Step Ginger Bug Recipe
Starting Your Ginger Bug – Day 1
To begin your ginger bug recipe, start by preparing the base culture. In a one-quart glass jar, mix 2 cups of filtered water, 1 tablespoon of chopped organic ginger, and 1 tablespoon of raw cane sugar. Stir thoroughly using a sterilized spoon to dissolve the sugar completely.
Cover the jar with a breathable cotton cloth secured with a rubber band.
This allows air to circulate, which is essential for natural fermentation, while protecting your starter from dust and debris. Place the jar at room temperature, away from direct sunlight, on a countertop or kitchen shelf.
From this moment, the natural yeast on the ginger skin and in the environment begins to activate, starting the slow process of fermentation.
Daily Feeding Routine and Care
A ginger bug recipe requires daily attention to stay active and healthy. Every 24 hours, remove the cloth and add 2 teaspoons of raw cane sugar and 2 teaspoons of chopped ginger to the jar. Stir gently to mix and replace the cover.
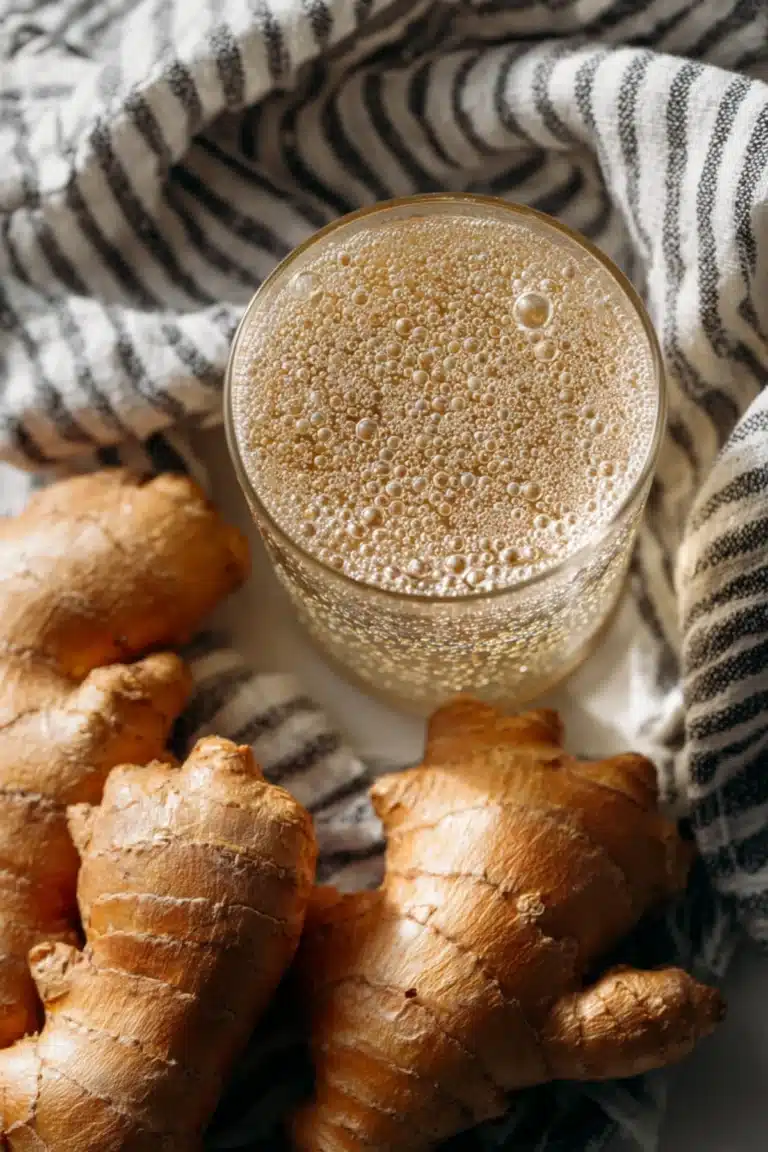
This daily feeding keeps the yeast thriving and ensures a steady build-up of natural carbonation. Over the next 4 to 7 days, you’ll begin to notice bubbles forming around the ginger pieces and rising to the surface. This fizz is a sign that your ginger bug recipe is alive and active.
If after a few days you don’t see visible bubbles, don’t panic. The culture often develops activity that isn’t always immediately noticeable. Be patient and continue feeding it daily.
Important Tips:
- Avoid overfeeding. Adding too much sugar or ginger too quickly can disrupt the natural balance of fermentation.
- Always use filtered or bottled water to prevent chlorine from killing beneficial microbes.
- If you notice mold, a rotten smell, or discoloration, discard the mixture and start a new batch with fresh ingredients.
Troubleshooting Your Ginger Bug
Why Isn’t My Ginger Bug Bubbling?
It’s normal to worry if your ginger bug recipe doesn’t show bubbles within the first few days. Fermentation is a natural process that depends on temperature, ingredient quality, and time. If your starter isn’t bubbly yet, here are some possible reasons:
- Cold environment: Fermentation slows down in cooler temperatures. Keep your jar in a warm spot, ideally between 70°F and 75°F.
- Chlorinated water: Tap water containing chlorine can kill beneficial yeast. Always use filtered or bottled water.
- Low sugar content: Sugar is the main food source for fermentation. If you underfeed your ginger bug, it may remain inactive.
- Freshness of ginger: Older, dried-out ginger might lack natural yeast and bacteria needed to start the process.
If your ginger bug recipe still shows no signs of life after 7 days, it’s best to start over with fresh ingredients and clean tools.
Common Mistakes and How to Avoid Them
Maintaining a healthy ginger bug recipe can be simple, but some mistakes can ruin the starter. Here’s what to avoid:
- Overfeeding: Adding too much sugar or ginger at once can overwhelm the culture, slowing down fermentation.
- Using metal utensils: Metal can react with fermentation acids, which might disrupt the starter. Stick to wooden or silicone spoons.
- Lack of cleanliness: Dirty jars or utensils introduce unwanted bacteria or mold. Always sterilize your equipment.
- Excess sunlight: Direct light can heat the mixture too much, causing fermentation to fail.
If you see white foam or bubbles forming, that’s a good sign. If you see mold (fuzzy black, green, or blue spots) or smell something foul, discard and restart your ginger bug recipe. A healthy starter will smell pleasantly sweet and slightly tangy.
For a relaxing and flavorful option, try our Korean Lemon Balm Tea Recipe as a refreshing alternative.
Health Benefits of Ginger Bug Recipe
Natural Probiotics and Gut Health
A well-prepared ginger bug recipe is a powerhouse of natural probiotics. These beneficial bacteria aid digestion, balance gut flora, and support a healthy immune system. When you consume drinks made from ginger bug, you’re adding live cultures to your diet, similar to yogurt or kombucha but without artificial additives.
Fermented beverages from a ginger bug recipe are known to help improve gut health by promoting the growth of good bacteria and reducing harmful microbes. This can lead to better nutrient absorption and a more balanced digestive system.
Ginger Bug vs Store-Bought Probiotics
One of the best things about making a ginger bug recipe at home is knowing exactly what goes into it. Store-bought probiotics or sodas often contain preservatives or processed sugars, which may not offer the same level of live cultures. With homemade ginger bug drinks, you control the ingredients, ensuring the final product is both natural and rich in beneficial bacteria.
Ginger itself is known for its anti-inflammatory properties and its ability to relieve nausea and digestive discomfort. You can read more about the health properties of ginger in this Wikipedia article on Ginger.
Fermentation, in general, is a centuries-old practice for creating healthy, preserved foods. If you’re curious about the science behind fermentation, visit Wikipedia on Fermentation.
Additional Health Boosts
Aside from probiotics, a ginger bug recipe combines the natural medicinal properties of ginger with the energizing effects of live cultures. It may help:
- Boost immune function.
- Reduce bloating and digestive discomfort.
- Support hydration when mixed with natural fruit juices.
- Offer antioxidants that fight free radicals in the body.
Best Uses of Ginger Bug
Making Homemade Sodas
One of the most popular uses for a ginger bug recipe is creating naturally carbonated homemade sodas. Once your starter is active and bubbly, you can mix it with fresh fruit juices, herbal teas, or flavored syrups to create refreshing, probiotic-rich beverages. For example, combine a few tablespoons of ginger bug with sweetened lemon juice, leave it to ferment for 1-3 days, and you’ll have a naturally sparkling lemonade.
The beauty of using a ginger bug recipe for sodas is that you can experiment with flavors and sweetness levels, tailoring the drinks exactly to your taste. Plus, the fermentation process adds a unique tang and fizz that can’t be found in store-bought sodas.
Creative Recipes Using Ginger Bug
Your ginger bug recipe is not limited to sodas. It can also be used to add a probiotic twist to other homemade beverages, such as:
- Fermented ginger beer: A classic choice that’s slightly spicy, sweet, and perfectly fizzy.
- Fruit-based mixers: Combine your ginger bug with fresh pineapple, apple, or cranberry juice for unique blends.
- Herbal infusions: Pair it with mint, basil, or hibiscus for refreshing probiotic teas.
Beyond drinks, some adventurous cooks use the liquid from a ginger bug recipe as a starter for sourdough-like breads or as a marinade base for unique flavoring. The possibilities are endless when you experiment with this naturally fermented starter.
How to Store and Maintain Ginger Bug
Weekly Feeding and Storage Tips
Once your ginger bug recipe is fully active, it’s time to think about long-term care. If you’re not using it daily, you can store the starter in the refrigerator to slow fermentation.
Before placing it in the fridge, feed it 1 tablespoon of chopped ginger and 1 tablespoon of raw cane sugar. This will keep the beneficial bacteria and yeast alive, even at lower temperatures.
When stored in the refrigerator, your ginger bug recipe only needs to be fed once a week. Simply add the same ratio of chopped ginger and sugar, stir, and let it sit at room temperature for 2-3 hours before returning it to the fridge. This ensures your culture remains strong and ready for use.
Important Notes:
- Always replace any liquid you use with an equal amount of filtered water and feed the bug with sugar and ginger.
- Mark the date on your jar to keep track of when it was last fed.
- If your ginger bug has been inactive for a few weeks, it may need an extra feeding cycle to become bubbly again.
For more probiotic-rich beverages, visit our fermented drinks category and get inspired.
Reviving a Dormant Ginger Bug
If your ginger bug recipe has been in storage for a while, it may look flat or have little activity. Don’t worry—this is normal. To revive it, strain out the old ginger pieces and feed it with 1 tablespoon of ginger and 1 tablespoon of sugar. Place it at room temperature for 12 to 24 hours. Once you see bubbles forming again, it’s ready to be used for your next homemade drink.
Over time, chopped ginger pieces will accumulate at the bottom of your jar. It’s a good idea to strain these out periodically and refresh your starter with new ginger, sugar, and water. This keeps your ginger bug recipe active and free from any off-flavors.
FAQs – Ginger Bug Recipe
How do I make a ginger bug?
Can you drink straight ginger bug?
Do you wash ginger before making a ginger bug?
What is the best use of ginger bug?
Why You Should Try This Ginger Bug Recipe
Final Thoughts on Fermentation
The ginger bug recipe is one of the easiest ways to start your journey into fermentation. With just three simple ingredients—ginger, sugar, and water—you can create a powerful probiotic starter that transforms ordinary drinks into gut-friendly, fizzy delights. Not only does this recipe connect you to a centuries-old tradition of natural fermentation, but it also lets you take control of the quality and flavors of your homemade beverages.
This isn’t just about making sodas. It’s about crafting something alive, healthy, and deeply satisfying. Once you see the bubbles rise in your jar, you’ll understand the excitement behind this process.
Encouragement to Experiment
Don’t be afraid to get creative with your ginger bug recipe. Use it to develop unique flavors by mixing it with seasonal fruits, herbs, or even floral infusions. The versatility of a ginger bug makes it an essential part of any home fermentation setup.
The first time I tasted a soda made from my own ginger bug, it felt like a personal victory. There’s nothing more rewarding than creating something healthy and delicious from scratch. So, gather your ingredients, start your jar today, and let the natural magic of fermentation bring your kitchen to life.
FOR MORE RECIPES FOLLOW ME ON PINTEREST